Rounded-corner rectangles in Photoshop
by
Marion Bates <mbates at whoopis.com>
Last modified: December 31 1969 16:00:00
Given: You have a picture.
Goal: You want the picture to have soft, rounded-corner edges for enhanced display against a light-colored background.
Solution and tutorial: There are several ways to do this, and most of them are a surprisinly large number of steps. This is the one I dreamed up, and I find it to be the simplest. YMMV.
- Open the picture in Photoshop. Make sure that Image->Mode is set to "RGB". Double-click the "Background" layer to convert it to Layer 0. Then make a new layer, Layer 1, and drag it to be under Layer 0.

- Go to Image->Canvas Size and change the canvas size to a little bigger (say, 110% or 120%). Click on Layer 1 (the underneath, empty layer) to edit it. Then get the round rectangle shape tool.

- Line up the crosshairs on the upper left corner of the image, and drag to the lower right corner -- in other words, trace the existing rectangle.

- You now have a shape layer containing the rounded rectangle. Control-click that layer and select Rasterize Layer.

- With that Shape 1 layer still selected, get the magic wand tool and set its Tolerance to 10, and check the box for Anti-aliased. Click outside the rectangle to select the space around it.

- Now, with the selection still running, select Layer 0.

- Hit the Delete key. You should see the sharp corners disappear.
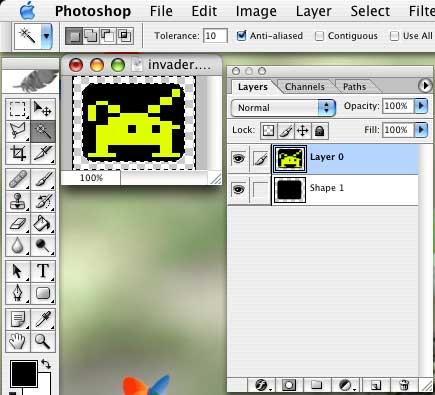
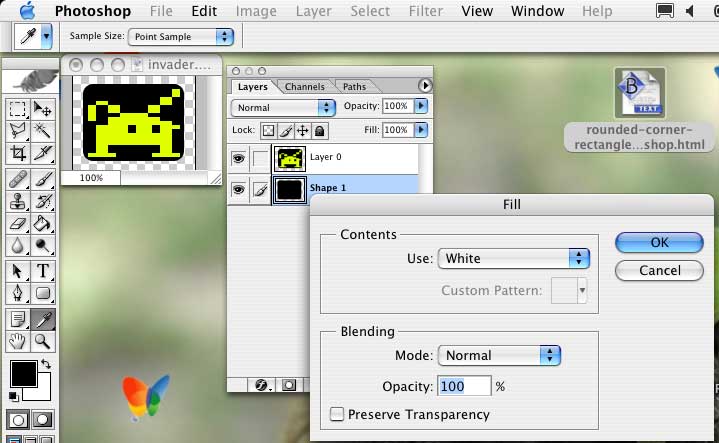
- Deselect the selection, and select the Shape 1 layer again. Hit shift-F5 and fill it with 100% white.
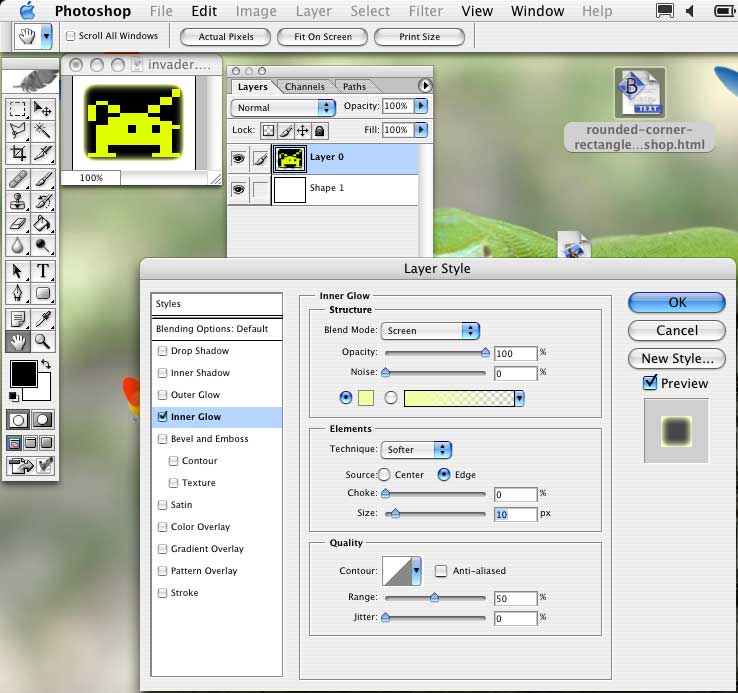
- Select Layer 0 and go to Layer Style and select Inner Glow.

- Fiddle with the Opacity and Size settings til you get it looking good. Hint: Maximize the opacity for the smoothest transition at the edges.
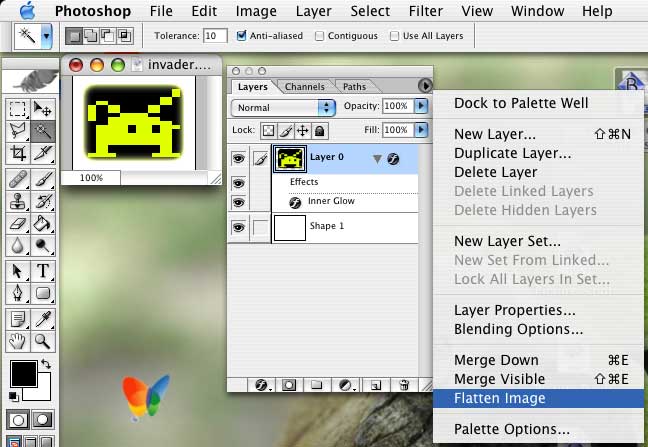
- Finally, flatten the image, and save it in the file format of your choice.
- The finished product:

 Get Euro-style oval stickers for Geeks!
NEW -- the "magic/more magic" light switch cover!
Click here for the story.
References:


 Get Euro-style oval stickers for Geeks!


 Get Euro-style oval stickers for Geeks!
